
This writeup is going to be a little bit different. This box is considered to be really easy, so I figured that I would try doing this one as a more in-depth writeup with more detail on how I think when going through the process of trying to complete a box. I am not an expert in the field and I am still learning.
This vulnerable machine is located at https://www.vulnhub.com/entry/infosec-prep-oscp,508/.
First and foremost, when I do VulnHub boxes, I create a private network in my virtual machine for the host and the target so they are separated from any other network.
What I like to do next is create a directory for this box (mkdir OSCP-prep) and open something so I can take notes (I tend to use CherryTree and have the documents enabled for Rich Text).

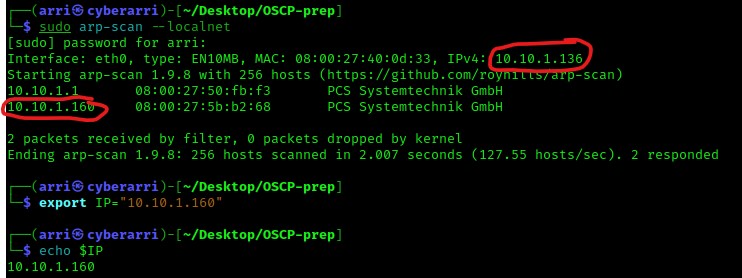
The following thing that I always do is to check the IP of the box and my own IP. From experience, I know that I can do this all in one shot using the command sudo arp-scan --localnet. In the image below, the top one circled is my own machine’s IP, and the other IP circled is the box’s IP. Now that I put the IP of both mine and the box into the word document. I also always export the IP as a variable so I can use the IP easier later (instead of having to copy/paste it or type it out every time I want to use it) with the command export IP="10.10.1.160". This variable “IP” is one specific to this session and can always be checked at a later time using the command echo $IP.
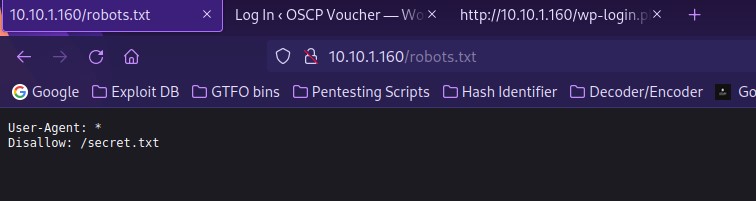
Now that I know the IP of the box, my next step is to always look for the open ports. I tend to use the command sudo nmap -p- -sC -sV $IP --open to do this. The sudo is needed to ensure it works properly, the “-p-” scans all ports, “-sC” looks for simple scripts, “-sV” looks at the service versions, the “$IP” references the variable I had set earlier for the IP, and “--open” ensure that only the open ports are showed in the final results. The results of this command reveal that ports 22 (ssh), 80 (http), and 33060 (mysqlx) are open. Below are the results that appeared (I pasted them into my CherryTree Text Editor and bolded/changed the color on what I believed to be important). I tend to bold and color every port number along with the service that runs on them. Also, if more information about that port, then I will bold it. This can be seen below with the http port. I bolded “robots.txt” because it revealed it and “/robots.txt” is something that I learned most websites commonly have to prevent indexing on certain files or directories. Also looking further beneath that, I believed that it was interesting that a “/secret.txt” came up in the results, so I bolded that to check out at a later point in time. The nmap scan also brought up a possible version number and a possible CMS (Content Management System) that was running the webserver (WordPress, version 5.4.2).

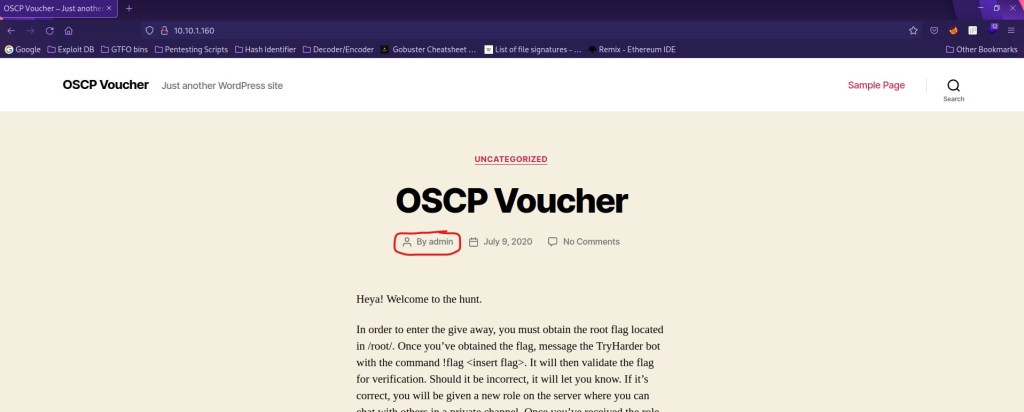
Whenever I see a http port open (in this case it is only port 80), my first thought is to immediately put it into FireFox and see what I can see on the website. While looking on the webpage and reading through the main page, I noticed that the very first post was made by the user “admin” (seen in the first screenshot below) and after reading further into the post, that a possible user “oscp” was mentioned (seen in the second screenshot below).

Another thing I like to do is to check the page source to see if there is anything hidden. After doing this and looking through the various HTML code, I decided that there was nothing of interest and that, if I needed to, I would come back later to inspect further (in case I had missed anything). There were many times with previous boxes that there were comments hidden in the code that would not be visible unless you check the source of the page. For every page I visit on any websites, I check the page source to make sure I do not miss anything. I scrolled to the bottom of the page and noticed the footer of the page was in fact a WordPress footer (see the image below), so I took note of this incase I would need to come back to it.
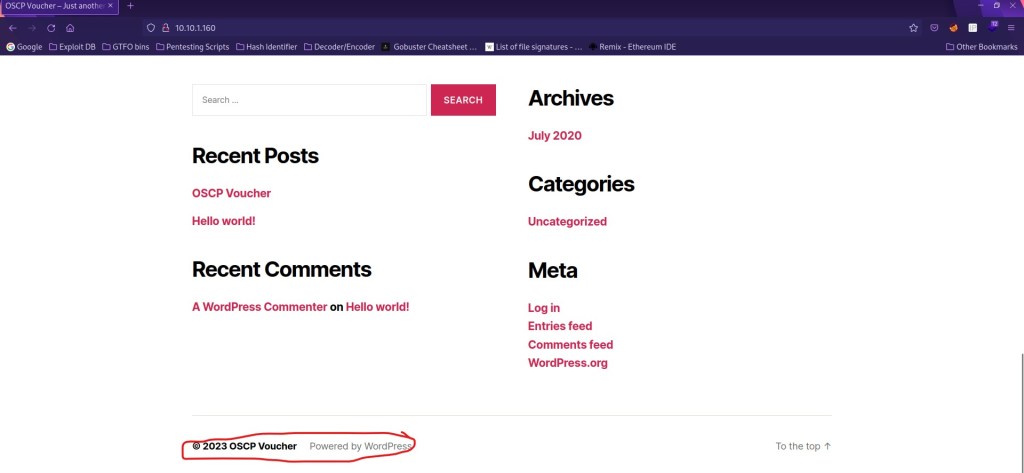
I did my normal method of checking the webpages with the items under the “Recent Posts”, “Recent Comments”, “Archives”, and “Categories” tabs shown in the image above. When I got to looking through the “Meta” tab, the “Log in” brought me to a log in page (as seen below). The “Entries feed” and “Comments feed” downloaded files. The “WordPress.org” linked to the actual WordPress site, so this was not something that I would be exploring further.

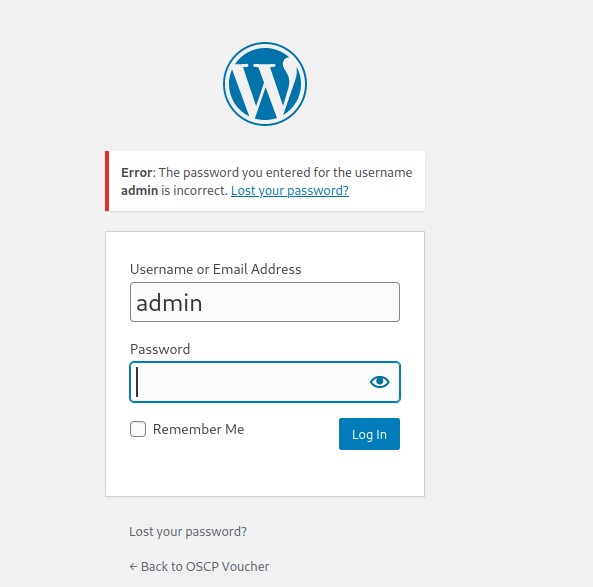
I checked the source code of the login page, but there was not anything of interest. I then decided to attempt a login as admin. I tried the passwords “password” and “admin”, but neither worked. However, it was useful to note that there was an error message that specified that the password for the user “admin” was incorrect. From previous experience, this is a bad thing and I thought I might be able to brute-force the password to get into the website.
I then tried to run a hydra scan to attempt a brute force of the password on the website with a command I had previously used in the box “Mr Robot”. The command I used to attempt the brute force was hydra $IP -l admin -P /home/arri/Desktop/Tools/rockyou.txt http-post-form "/wp-login.php:log=^USER^&pwd=^PASS^&wp-submit=Log+In:S=Location" -V -I -f -o found. The “$IP” specifies that the target is the IP of the box, the “-l” specifies that the user I am attempting to log in as is admin, the “-P” specifies a wordlist to use when trying to crack the password (I used “rockyou.txt”), “http-post-form” specifies that the attack is meant for a form post, the following section tells hydra where to put the username and password on the login page and that a successful (“S”) attack will result in a different location, “-V” shows the user and password combinations (verbose mode), “-I” ignores existing restore files, “-f” exits after the first successful combination of the username and password is found, and “-o” writes the combination to the “found” file.

Once the command was executed, “123456” came up as the password for the user “admin”. I tested this on the webserver to log in and it did not work. I realized that there must be something that attempts to mitigate brute forcing attempts.

Now that I explored this area, I took note of it if I would later need to come back to it. I proceeded to check “/robots.txt” on the website (which came up in the nmap scan). This mentioned the “/secret.txt”, which had also come up on nmap scan. I also checked the page source, however there was nothing other than the text that was already displayed on the page.
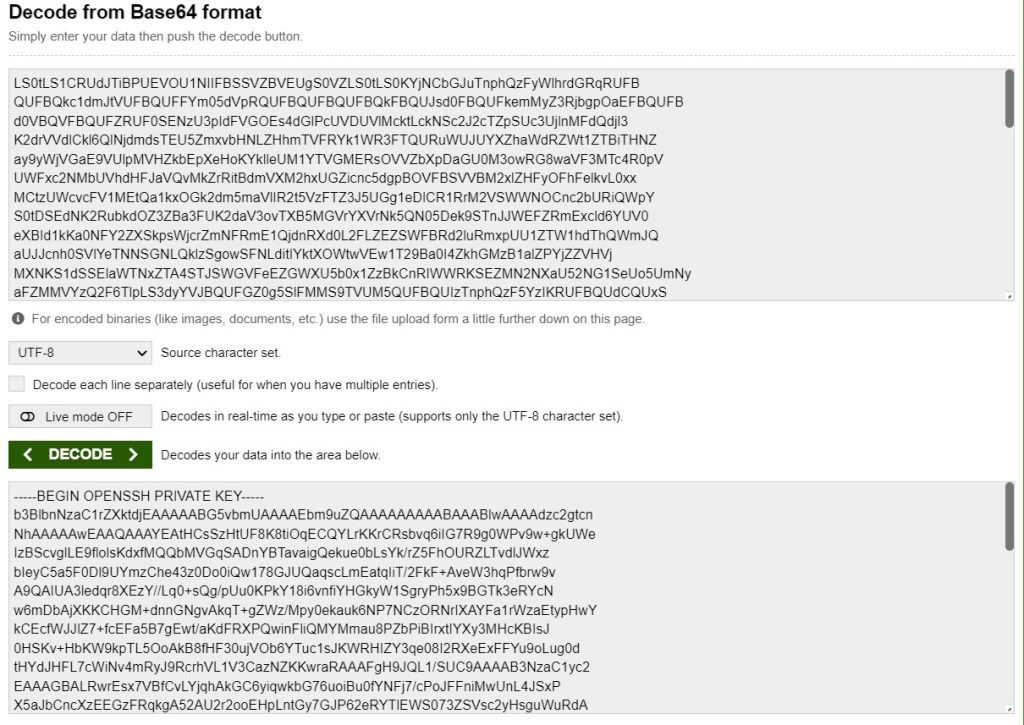
My next step was to go to “/secret.txt” to see what was on that page. After looking at it, I immediately noticed (from previous experience) that it was base 64 encoded due to the equal signs at the end. I checked the page source to verify I had not missed anything (and I had not).

Now that I had something that was base 64 encoded, I decided that I would need to decode it. I opened up BurpSuite and went to the decoder. I copied the encoded text from the website and then pasted it in the top portion. I then clicked “Decode as” and then selected Base64. This revealed that it was an OpenSSH private key.

Another way this could be done is by going to the website https://www.base64decode.org/ and pasting the encoded text into the portion at the top. Then the “Decode” button can be hit and below that, the OpenSSH key will be revealed.
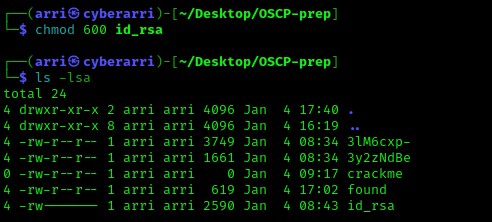
Now that I have this, I copied this private key and used nano id_rsa to create a file that I would paste this decoded text into. Once it was pasted in, I saved and exited using Ctrl+X.

My idea for this id_rsa file was to attempt an SSH login using this key. For this key to work properly, the permissions needed to be set so that only the user had read and write. I achieved this using chmod 600 id_rsa. Below, the id_rsa has the correctly set permissions.
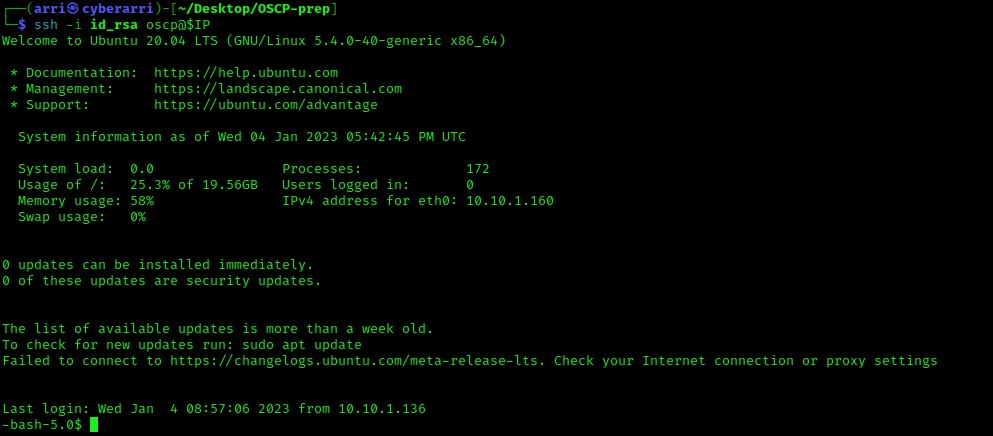
Now, its time to give this a shot! I decided to try the user “oscp” that was mentioned earlier to log in and I used the command ssh -i id_rsa oscp@$IP. This let me log in without a password!
Now that I had a foot hold on the system, it was time to try to escalate my privileges. Over time, after gaining a foot hold on a system, there are steps that you will complete for post-enumeration. One of the major ones is to look for SUIDs, which is a sticky-bit permission set on a file that allows a specific user to run that program or file with root/administrative privileges.
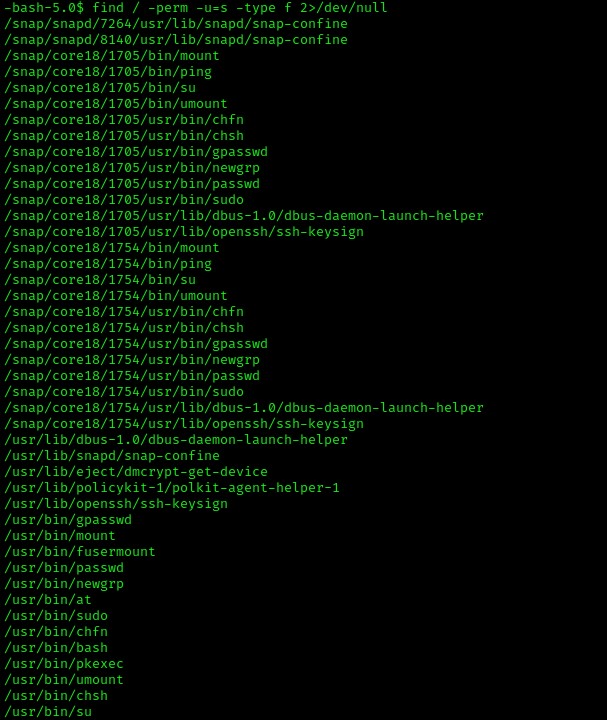
When you look at enough SUIDs, you recognize the normal ones. The ones that are not normally set stick out, or it is very clear that they are oddball SUIDs that are worth looking into. When I was newer to looking at SUIDs, I learned that I can go to GTFO bins and search each one, one-by-one, to see if any of them could be leveraged for privilege escalation. In the list above, the oddball is “/usr/bin/bash”.

After you search and the result comes up, look for privilege escalation with SUID inside the page, as seen below. The GTFOBins for “bash” is here.

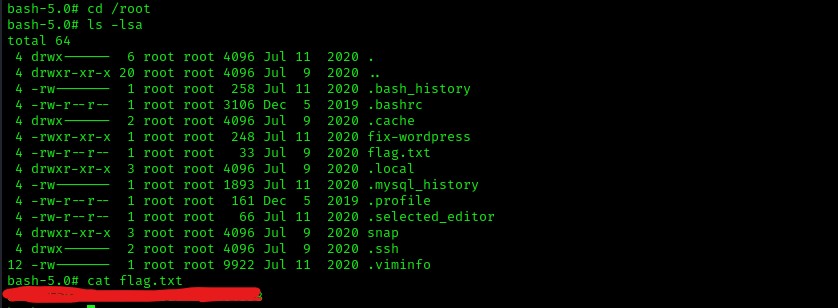
Now that I knew what should be run to try this SUID, I went back to the terminal that was connected to the machine and executed bash -p.

It is important to note the change from ‘$’ to ‘#’ in the prompt. The ‘$’ signifies a normal user, while ‘#’ signifies root. I double-checked that I was now root by typing whoami and then id to verify I had the root permissions.

Now that I verified that I had root permissions, I knew that I could do anything on the system that I wanted to. I proceeded to go to the “/root” directory, which is the root user’s home, using cd /root. This is not accessible by anyone other than the root user, and from doing previous boxes, I know that there is typically a root flag here. I viewed the contents of the file using ls -lsa and I noticed that there was a root flag named “flag.txt”.
The box is now completed!
As I mentioned at the beginning, this is a different type of writeup style that I decided to try since this box was considered to be easier. Most boxes have various rabbit holes that you can get stuck on and it can get frustrating. For example, this box had WordPress which I got caught up in for a bit. I am sure that mysqlx was another rabbit hole (and I am glad that I did not try that first). We all experience rabbit holes, and the key is to not spend too much time on certain areas. Sometimes it is best to explore other options and come back if necessary. I hope you guys enjoyed this writeup!


Leave a comment